
SIMPLE & EFFECTIVE DARKROOM WINDOW BLINDS / Container Darkroom part 13
Hey guys its been quite a while since I last gave you updates on my shipping container darkroom. For those of you who are new to my Blog I have built my dream darkroom all by myself inside a 2,5x6m shipping container from the electricity to darkroom sink. I have been using it for well over a year now and it became my studio where I produce Zebra products, film videos, design new things…
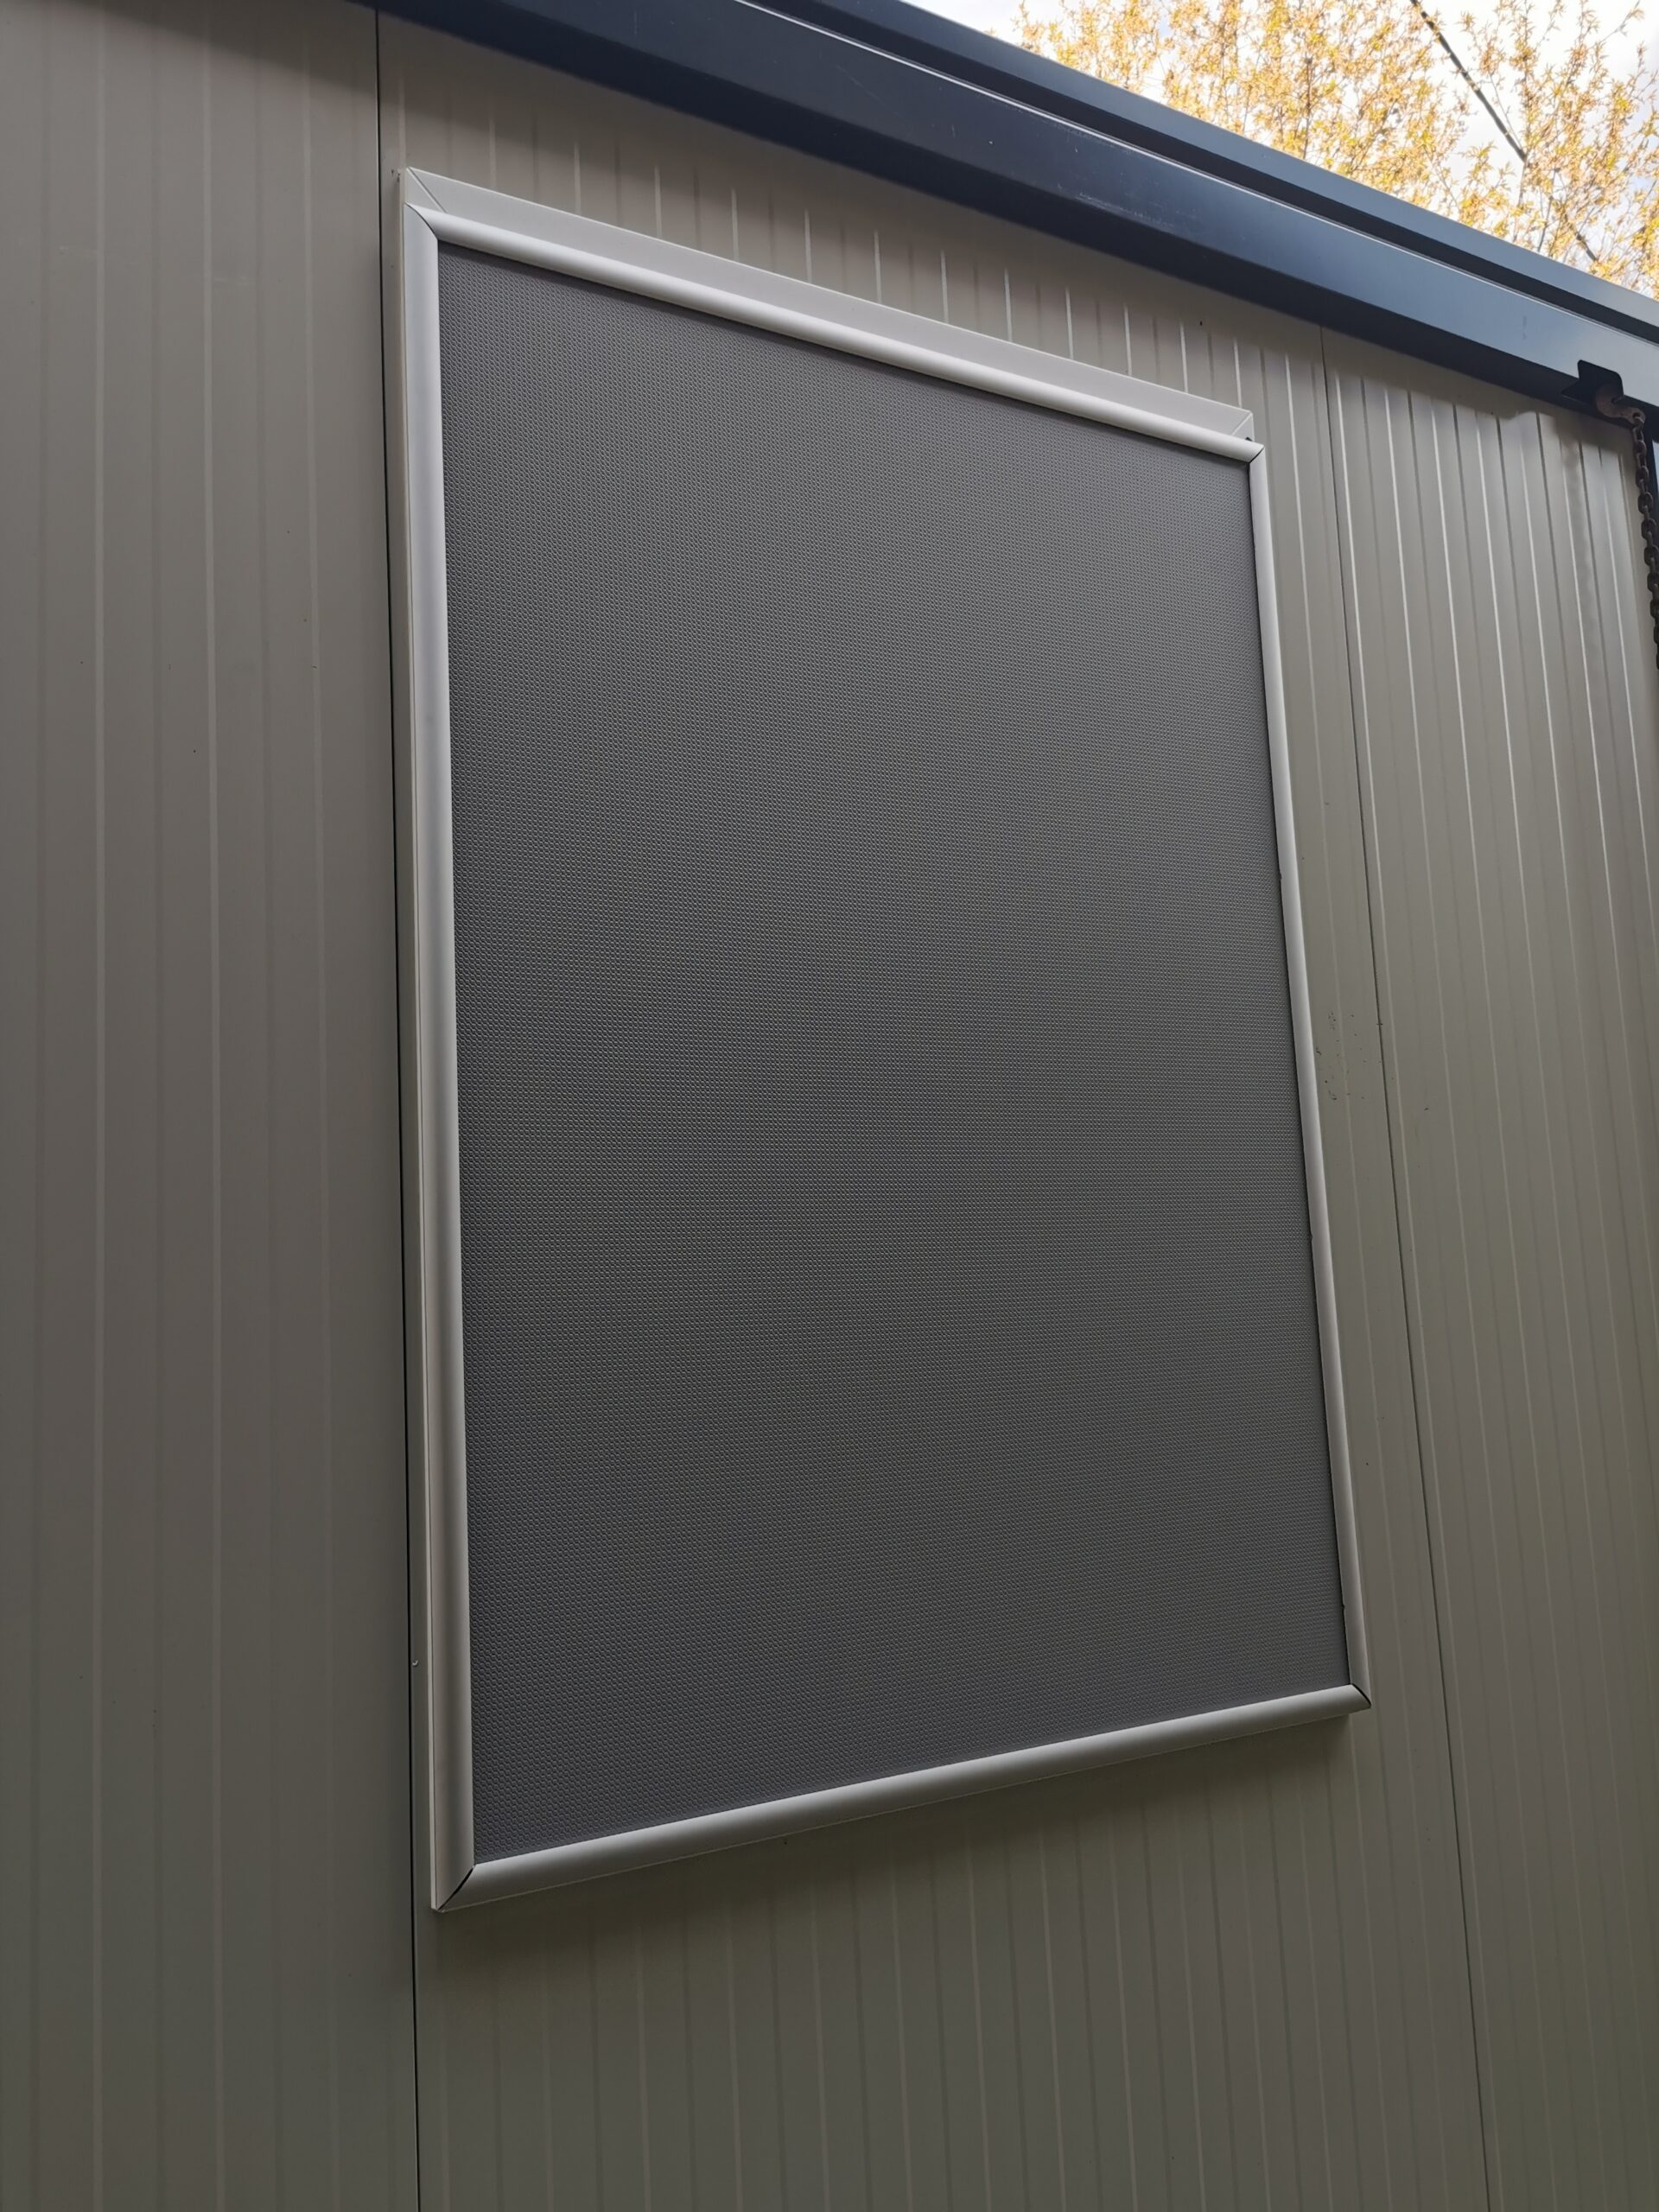
The container is separated into two part light-room and darkroom. The light part of the container has a big window that gives me a lot of great light to work under but when I coat the plates I have to light seal this “light-room” space so I can escape the darkroom and close the doors behind to leave dry-plates drying over the night. In the winter time when it gets dark at around 6pm already I just had a simple blackout curtain to cover the window and that was it. But now it the summer with a lot of new orders coming in I also wanted to coat the plates midday when the sun is at its full power. In order to be able to do that I had to found another solution for blinding out the window. I wanted something that was easy to install and remove. After thinking a bit out of the box I ended up buying and installing a big aluminium poster frame. Yeah I know it sounds strange and that its a very unconventional solution but it works great. I unscrewed the core out so I was left with just the frame that I screwed to the outside of the window. The sides of the poster frame open so you can install the board or in my case I just reused the 5mm thick pvc core. When the board is in place I just clip the sides back down and my windows is completely shaded in a matter of minutes. This kind of frames can be custom cut to fit any window size out there. All I am missing now is a cool looking sticker to cover the ugly grey pvc board. I know most of us have or had improvised darkrooms so I really wanted to share my solution with you as I thought you could find it useful as well.
Another thing I had to do was dim my LED safelights down even further. For normal work in the darkroom with loading, unloading, and developing plates lowest brightness setting of my LEDs works fine but when I coat a bigger batch of plates sometimes even 80 or more at a time they can bathe under the safelights even up to 2h or more which can already start to effect the emulsion. I have a remote to control the brightness and could just install a few more resistor but at the end I rather bought some rubylith foil cut it into strips and slide it in my led channels. By doing that I could control the brightness in various part of the darkroom: above the sink where plates are being developed I only installed one layer of the foil and above the counter where I coat and dry them I installed two layers which gives me just enough light to work. I ran some test with paper that is at least twice as sensitive as plates and fogging started to appear only after 4h under the lights which is very good. Now I can coat and work with plates without being under pressure and rushing things! Wohooo 🙂