
Salt print – Detailed Step by Step Walkthrough
I love working with alternative printing processes as they only need a few ingredients to work and are perfect for those who would like to learn the very basics of recording the light. One of the first alternative printing processes used for turning negatives to positive prints was Salt print invented in the mid 1830s by Henry Fox Talbot. He used to soak plain writing paper first in a weak solution of ordinary table salt and then in strong silver solution. This way he got a light sensitive sheet of paper that darkened when exposed to the sun and could become permanent by fixing in a hypo solution. This way Salt printing became known as one of the processes marking the very birth of photography.
How does it work?
Salt print is a relatively uncomplicated printing process as it only needs three ingredients to work. Salt, silver nitrate and water to dissolve both chemicals. When salt and silver solutions are mixed together silver chloride (halide) is formed that is sensitive to light.
What do you need to make a Salt Print?
Before you start mixing things lets go through the materials you need to make a basic salt print. First one on the list is of course the salt:
Which salt?
Not any salt is good. It needs to be pure without any additives so the best choice is of course photographic grade salt but because it’s always nice to save some money a much cheaper alternative is sea salt which will work just as good!
Beside the salt you also need the following:
- protective gloves
- distilled water
- silver nitrate
- precise scale
- mixing containers
- mixing rod or magnetic stirrer
- storage bottles
- some paper preferably watercolor paper that can hold the solution well. My paper of choice has always been Fabriano 5
- Some masking tape to help with holding the paper in place for coating
- coating tool, depending on the coating technique you are gonna use
- to expose the print you will also need a stable uv source. You can use the sun or uv lamp.
- printing frame
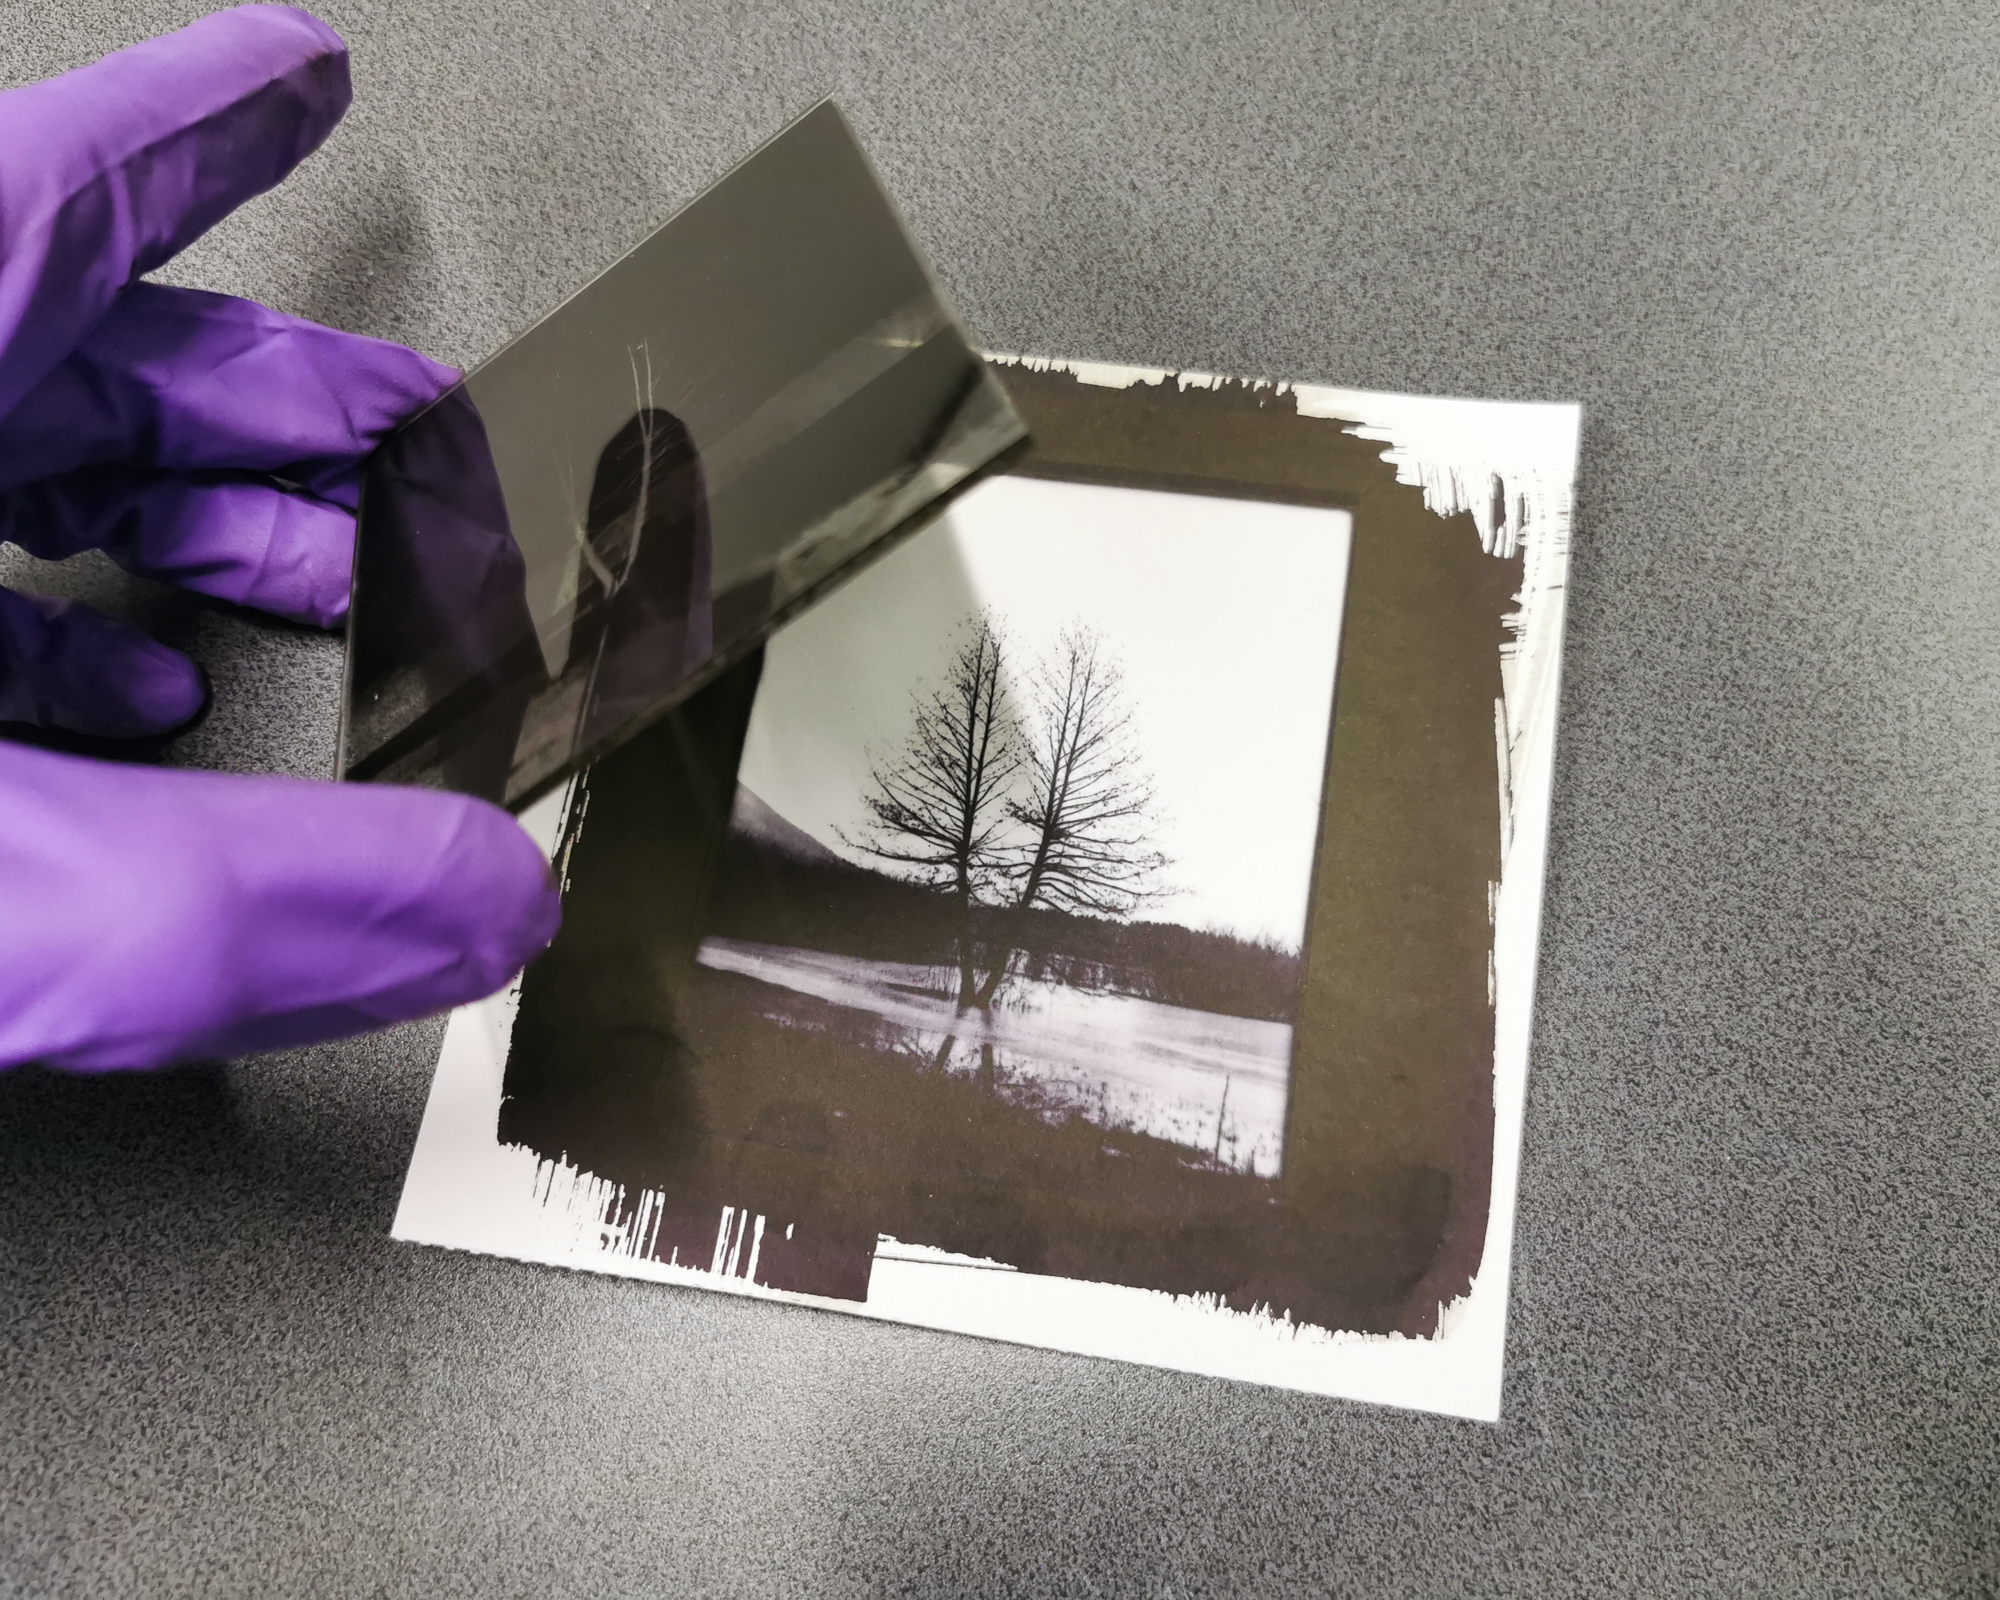
- a dense negative that can be made on glass like this one here or printed on a transparency. If you don’t have a negative, go ahead and pick up some flowers from your garden and make a photogram…
- developing trays
- and a fixer
PREPARING A & B SOLUTION
Preparing both solutions is very easy but make sure to put some protection gloves on as silver solution will stain just about everything it gets in touch with! My hands are a great example why you should wear them. These skin stains won’t go away for at least a week or so.
2% salt solution
- sea salt 2g
- distilled water to make 100ml
For the 2% salt solution dissolve 2 g of sea salt in 50ml of distilled water. I recommend you to use warm water for the salt to dissolve faster. When it’s dissolved top it off with more water until you reach 100ml. You can store the solution in a simple plastic or glass bottle.
12% silver solution
- silver nitrate 12g
- distilled water to make 100ml
For the 12% silver solution start by dissolving 12g of silver nitrate in 50ml of water. When dissolved pour in more distilled water to make 100ml. Silver solution needs to be stored in a brown bottle to minimise light exposure and prevent any possible impurities growing inside.
I also label both solutions with the concentration and a date.
COATING TECHNIQUES
To coat the paper there are many coating techniques and in these tutorial I will go through the ones that are most commonly used.
Before you start with the coating process, take a pencil and make a mark on the back of the paper so you will not be coating one side with salt and the other with sensitying solution by mistake. You need to make sure you coat the same side with both solutions or you will have no image!
Foam or fine bristle brush:
By using this method you will end up with a bit more artistic look as the coating won’t be so even and brush marks will become a part of the print. Make sure to do this on an even surface. You can prevent the paper from moving by holding firmly on the edges or taping the corners down with masking tape. I will explain my brushing technique into more detail in the next step.
Cotton tab:
Next one on the list is a plain and simple cotton tab. This is how it was done in the old days. To be honest I never liked using this technique as it’s often quite messy and hard to see what you are doing.
Floating technique:
Floating the paper will leave an even coating as the fibers will suck in as much of the solution as they possibly can. First pour your salt solution into a tray, take your paper and fold up the corners so you can lift it back up without touching the coated side. Don’t push it in just leave it on the top and let it soak in the solution. In a short time you will see how the edges will start to curl up and this is the sign that paper is coated with a thin layer of salt and ready for drying. Just pinch the edge of the paper with your fingers and pull it out.
Rod technique:
And the last one is rod technique that is usually used by those who really want to get smooth even coating. I don’t have an appropriate rod at the moment as it should be a bit thicker ruffly about 1cm but the principle is the same. It’s hard to explain this technique in words so I invite you to check out the video I made.
I don’t mind my prints looking hand made so I will be using a foam brush thru this whole process.
APPLYING BOTH SOLUTIONS
Salt solution
Take your salt solution and pour it into a smaller cup. Place your paper on a flat surface with the mark you made earlier facing down. Then dip the brush in salted water and start coating the paper in one of the corners. Repeat the strokes until the whole surface is coated. Do another pass perpendicularly to the previous layer. It’s hard to see what you are doing as the sensitizing solution is clear as well so I recommend you to be very methodical with your coating technique. You can help yourself by tilting the paper that will cause the reflection and offer you a view of where the paper is coated and where not. Once the paper is evenly coated let the solution dry for around 30min.
Silver solution
Next step in the coating process is the sensitization where sodium chloride and silver nitrate will form light sensitive silver halides.
This is where you should dim down your light as much as you can or ideally work under red safe light to prevent any unwanted fog. I am keeping my lights on just so you can see better 😉
Before you start coating, make another mark on the back of the paper just to know this paper will now be both salted and sansitized.
Coat the paper with silver solution in the same way you did earlier with the salt.
Once finished let the sensitized paper dry under safe lights or even better in complete darkness. It will take around 30min.
EXPOSURE
When Salted paper has dried it is ready for exposure. To make my exposures I helped myself with a store bought picture frame that allowed me to press the negative firmly to the salter paper which is essential for a sharp print.
This photo frame method is okay for smaller prints but with bigger ones you just won’t be able to get sufficient pressure in the middle of the frame and your results will be unsharp. For bigger prints or in general I would recommend you to use a proper printing frame.I still have to build myself a frame like that which makes printing much easier but I would like to film it and show you how it’s done as well!
With your printing frame ready, align the negative with the coated side of salted paper. When you are happy with the layout, cover it with a sheet of glass to press it down and take it out on the sun for anywhere between 10-20min. There is no universal exposure time as it depends on the concentrations you are using, sun intensity, density of the negative and so on. This means you will have to do some tests to determine what works for you.
During the exposure you can clearly see how the reaction is starting to happen with the paper turning more and more brown. When silver halides react with UV light they transform back to metallic silver.
After the exposure take the print back inside and separate the negative from the paper.
Correctly exposed contact image has a deep brown colour with a slight purple hue to it. It may seem extremely contrasty and dark to start with but don’t worry it is gonna become much brighter when we start with the processing.
PROCESSING
Also during processing I recommend you to work under safe lights to prevent any unwanted fog. I will be working under tungsten lights on just so you can see better what is going on with the print.
1st WASH
First wash the print in water for 5min to remove all of the unreacted chemicals. You will clearly see that happening as the print will become brighter and water will get cloudy. I recommend you to change the water half way thru washing as well to really get everything washed out.
*After the first wash you can also tone the image in lets say gold chloride but I would like to keep thighs plain and simple in this salt print tutorial so I will skip this step.
FIXING
To prevent the print from becoming completely brown you need to fix it for 5min where you will remove all unexposed silver chloride and make the image permanent. When you get the paper in the fixer it will slowly start to turn to bright chocolate brown colour which is completely normal.
2nd WASH
After the fixing you need to wash the print for one last time in tap water for another 10min to remove the fixer. I recommend you to change the water a couple of times to eliminate any chance of fixer stains.
DRYING
After you are done processing you can get the paper drying. Print may look a bit overexposed when wet but when it dries it will darken quite a bit so keep that in mind when you are selecting your ideal exposure.
This is the print before and after drying.
When your salt print has dried you can leave it as it is or you can protect the print even further and make it more shiny by melting some beeswax mixed with lavender oil and buff it into the print.
There you go we just made ourselves a beautiful salt print. I hope you enjoyed this tutorial and found the information you searched for. If you have any further questions or ideas on how to do things differently don’t hesitate to contact me thru social media or email.